An Introduction to MuleSoft Anypoint Studio
What is Anypoint Studio?
Anypoint studio is a tool for building integrations & APIs for systems. It is based on eclipse (the popular open source Java IDE) so provides a familiar environment for many. It is a graphical tool which has a low learning curve and makes it easy to build integrations. Connectors, as the name suggests, are the part in a “flow” which actually connects to a system and extract or import data. There are many built-in connectors such as Salesforce, databases, ftp and even Facebook & Twitter. It is also possible to download more that have been built by the community from the Anypoint Exchange or develop your own if what you need isn’t available. The following guide shows just how quick and easy it is to create a MuleSoft application which grabs data from a system and transforms it before sending it to a different system.
Creating a basic app - A Salesforce REST API
The flow that we will create will return data from Salesforce (Accounts in our example) to the browser in JSON when visiting http://localhost:8081/salesforce.demo
- Create a new Mule project (File -> New -> Mule Project).
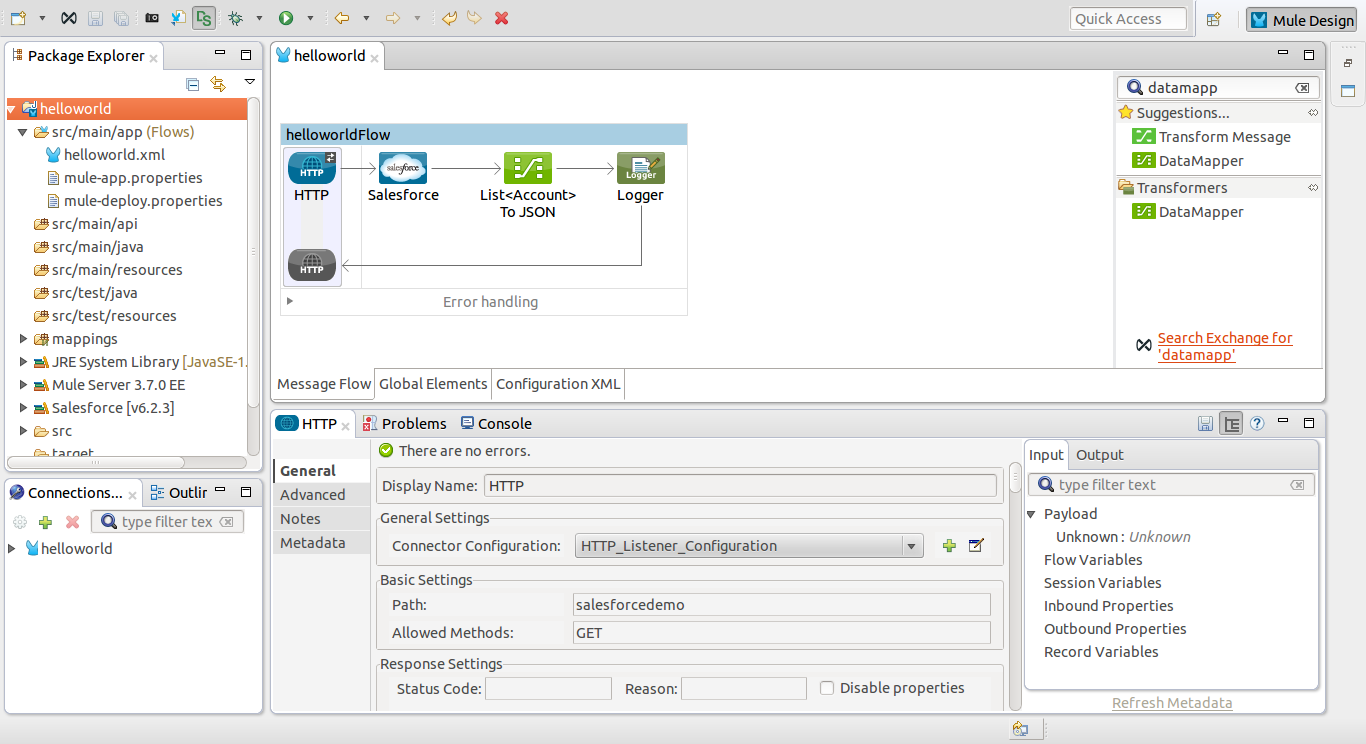
- In the right panel search for “HTTP” and drag the result across into the main area, do the same for “Salesforce”, a “DataMapper” and a “Logger” so it looks like the image above. We now have the basic outline of our flow so it’s time for some configuration.
- First click on the HTTP connector that we have put in the flow and click the plus next to connector configuration in the panel at the bottom. Enter “salesforcedemo” in the base path field and click ok. Note – If you are running something else on port 8081 then you will need to change that setting to a different port.
- Create a (free) developer Salesforce account, add some Account records and then do the same as above with the Salesforce connector, choose basic authentication, enter your account credentials (you will need to request a security token in Salesforce and enter that) and test connection. Assuming it succeeded, hit okay twice and back in the bottom panel next to operation choose “Query” from the drop-down box and enter the following: SELECT Name,Phone,Type FROM Account.
- Next we need to look at the DataMapper which takes data in one format and converts it into a different format as it says on the tin. In our case we want to transform the Salesforce data we have received into a JSON format and output that to the browser. In the configuration for this component we have 2 parts – Input & Output. The input side should automatically detect the Salesforce object we are grabbing but we will need to configure the output. Next to Type choose JSON, select From Input -> Copy Structure. Then click Create Mapping.
- In the logger configuration simply enter #[‘Sending to browser’] in the Message field.
Finally run the application by right-clicking the project in the left hand side browser -> Run-As -> Mule Application. When you see the word DEPLOYED in your console that means your application should now be running and if you visit http://localhost:8081/salesforcedemo you should retrieve a JSON view of all the accounts in your Salesforce environment.
Update - 2020 This post was done in 2015 and is now very outdated as it was done on a much older version. Perhaps there will be a new post in the future to reflect the latest Mule version.